Mastering Computer Maintenance: Keep Your PC Running Smoothly

Regular computer maintenance is essential for achieving optimal performance and extending the lifespan of your device. By taking care of your computer, you can ensure it runs smoothly and efficiently. In this article, we will discuss the importance of computer maintenance and provide valuable tips and techniques to help you keep your computer in top shape. From cleaning and software updates to disk cleanup and more, these practices will help you maintain a reliable and high-performing computer for years to come.

What is Computer Maintenance?

Computer maintenance refers to a set of activities performed to ensure a computer system’s proper functioning and longevity. It involves regular care, cleaning, and optimization to keep the hardware and software components in optimal condition. Computer maintenance includes software updates, disk cleanup, virus scanning, hardware inspection, and system optimization. 

By performing these maintenance activities, you can prevent issues, improve performance, enhance security, and extend the lifespan of your computer. It is an essential practice for maintaining the reliability and efficiency of your computer over time.

Computer Maintenance Checklist

Regular computer maintenance is crucial for keeping your system running smoothly and ensuring optimal performance. By following this checklist, you can keep your computer in top shape and minimize the risk of potential issues. Here’s a comprehensive computer maintenance checklist:

  • Update Operating System: Keep your operating system up to date by installing the latest updates and patches. This ensures improved security, bug fixes, and compatibility with new software.
  • Update Software: Regularly update all installed software, including web browsers, antivirus programs, productivity tools, and multimedia applications. Updated software provides enhanced features, performance improvements, and necessary security patches.
  • Run Antivirus Scans: Perform regular scans using reliable antivirus software to detect and remove any malware or viruses that may harm your system.
  • Clean Up Disk Space: Regularly remove unnecessary files and free up disk space. Use built-in disk cleanup tools or third-party software to delete temporary files, cache, and old system backups.
  • Defragment Hard Drive (if applicable): If you have a traditional hard drive, consider defragmenting it periodically to optimize file storage and improve system responsiveness.
  • Organize File System: Maintain a well-organized file structure by creating folders and subfolders for efficient data management. Regularly delete or archive files you no longer need.
  • Backup Important Data: Create regular backups of your important files and store them on external drives, cloud storage, or network storage. This protects your data from accidental loss or hardware failures.
  • Clean Hardware: Clean the computer’s exterior using a soft cloth and gentle cleaning solution. Use compressed air to remove dust from the keyboard, ports, and fans.
  • Check Hardware Connections: Ensure all cables, connectors, and peripherals are securely plugged in. Periodically check and reseat RAM modules, expansion cards, and other internal components.
  • Monitor System Temperature: Keep an eye on the computer’s temperature to prevent overheating. Ensure proper airflow, clean dust from fans, and consider using cooling pads or additional fans if needed.
  • Remove Unnecessary Startup Programs: Disable or remove unnecessary programs that launch at startup. This helps improve boot time and overall system performance.
  • Password Security: Regularly update and strengthen your passwords for user accounts, email, and online services to enhance security.
  • Educate Yourself: Stay informed about the latest computer security practices, malware threats, and software updates. Educate yourself on safe browsing habits and avoid clicking on suspicious links or downloading unknown files.

By following this computer maintenance checklist, you can keep your system running smoothly, protect your data, and prolong the lifespan of your computer.

Regular Software Updates and Security

Keeping your computer’s software up to date and implementing effective security measures are crucial for maintaining a safe and protected computing environment. In this section, we will explore the importance of updating the operating system, software, and drivers, as well as implementing essential security practices for safe web browsing and email usage.

Importance of Updating Operating Systems, Software, and Drivers

  • Operating System – Regularly updating your operating system is vital for several reasons. Updates often include security patches that address vulnerabilities and protect your system from potential threats. They also deliver performance improvements, bug fixes, and compatibility enhancements with new software and hardware.
  • Software – Updating installed software, such as web browsers, productivity tools, and multimedia applications, is equally important. Software updates often include new features, stability improvements, and critical security patches that address known vulnerabilities.
  • Drivers – Keeping your device drivers up to date is essential for optimal hardware performance and compatibility. Updated drivers provide bug fixes, performance enhancements, and improved stability for your computer’s components, including graphics cards, sound cards, and network adapters.

Implementing Effective Security Measures

  • Antivirus Software – Install reputable antivirus software and keep it updated. Antivirus programs detect, quarantine, and remove malware, viruses, and other malicious threats that can compromise your system’s security.
  • Firewall Protection – Enable and configure a firewall to monitor incoming and outgoing network traffic. A firewall acts as a barrier against unauthorized access and helps prevent malicious activities.
  • Strong Passwords – Use strong, unique passwords for your user accounts, email, and online services. Avoid using easily guessable passwords and consider using password managers to securely store and manage your passwords.
  • Two-Factor Authentication (2FA) – Enable two-factor authentication whenever possible. This adds an extra layer of security by requiring a second verification step, typically through a mobile device, to access your accounts.
  • Software Whitelisting – Consider implementing software whitelisting, which allows only approved applications to run on your system. This helps prevent the execution of unauthorized or potentially malicious software.
  • Regular Software Scans – Perform regular scans of your computer with antivirus software to detect and remove any malware or viruses that may have infiltrated your system.

Best Practices for Safe Web Browsing and Email Usage

  • Stay Updated – Keep your web browser and email client updated to ensure you have the latest security features and patches.
  • Secure Websites – Whenever possible, use certain websites (HTTPS) for online transactions, login credentials, and sensitive data transfers. Look for the padlock symbol in the browser’s address bar.
  • Exercise Caution with Email Attachments and Links – Be cautious when opening email attachments or clicking on links, especially from unknown or suspicious sources. Verify the authenticity of emails before interacting with them.
  • Avoid Phishing Attempts – Be vigilant against phishing attempts, where attackers masquerade as legitimate entities to deceive you into revealing sensitive information. Avoid clicking on suspicious links or providing personal information in response to unsolicited emails.
  • Use Pop-Up Blockers – Enable pop-up blockers in your web browser to prevent unwanted pop-up windows that may contain malicious content or phishing attempts.
  • Regularly Clear Browser Cache and Cookies – Clear your browser’s cache and cookies periodically to remove temporary files and data that could potentially be used to track your online activities.

By prioritizing regular software updates, implementing effective security measures, and following best practices for safe web browsing and email usage, you can significantly enhance the security of your computer and protect it from potential threats. These practices contribute to a safer and more reliable computing experience.

Disk Cleanup and Organization

Maintaining a clean and organized disk is essential for optimizing your computer’s performance and maximizing available storage space. In this section, we will explore the importance of disk cleanup and organization, including removing unnecessary files and programs, organizing files and folders, and utilizing disk cleanup tools to optimize storage usage.

Removing Unnecessary Files and Programs

  • Temporary Files: Delete temporary files that accumulate over time and occupy valuable disk space. These files are typically created by various applications and can include temporary internet files, system cache files, and leftover installation files.
  • Recycle Bin: Empty the Recycle Bin regularly to permanently delete files that you no longer need. Remember that files in the Recycle Bin still occupy disk space until they are permanently deleted.
  • Unused Applications: Uninstall unused or unnecessary applications from your computer. This not only frees up disk space but also declutters your system and improves overall performance.
  • Duplicate Files: Identify and remove duplicate files on your computer. Duplicate files can consume a significant amount of storage space, so removing them helps optimize disk usage.

Organizing Files and Folders

  • File Organization: Create a logical and structured organization system for your files and folders. Categorize them based on their type, purpose, or any other meaningful criteria that suit your needs. This makes it easier to locate and access files quickly.
  • Folder Hierarchy: Utilize folders and subfolders to create a hierarchical structure that reflects the relationships between your files. This hierarchical organization helps keep your files organized and makes navigation more intuitive.
  • File Naming Conventions: Use consistent and descriptive file names to make it easier to identify and locate files. Consider including relevant keywords, dates, or other relevant information in the file names to facilitate searching and sorting.

Utilizing Disk Cleanup Tools and Optimizing Storage Usage

  • Disk Cleanup Utility: Take advantage of the built-in disk cleanup utility in your operating system. This tool scans your computer for unnecessary files, such as temporary files, system logs, and error reports, and offers the option to delete them, freeing up disk space.
  • Disk Defragmentation: Perform periodic disk defragmentation to optimize the arrangement of files on your hard drive. This process consolidates fragmented files, improving file access speed and overall system performance.
  • Storage Optimization: Utilize storage optimization features provided by your operating system or third-party tools. These features analyze your disk usage patterns, identify large or unused files, and suggest ways to optimize storage space.
  • Cloud Storage and External Drives: Consider utilizing cloud storage services or external drives to offload less frequently accessed files. Storing files in the cloud or on external drives can free up local disk space while still allowing you to access them when needed.

By regularly performing disk cleanup to remove unnecessary files, organizing your files and folders for easy access, and utilizing disk cleanup tools and storage optimization techniques, you can maintain an efficient and well-organized disk, leading to improved system performance and increased storage space availability.

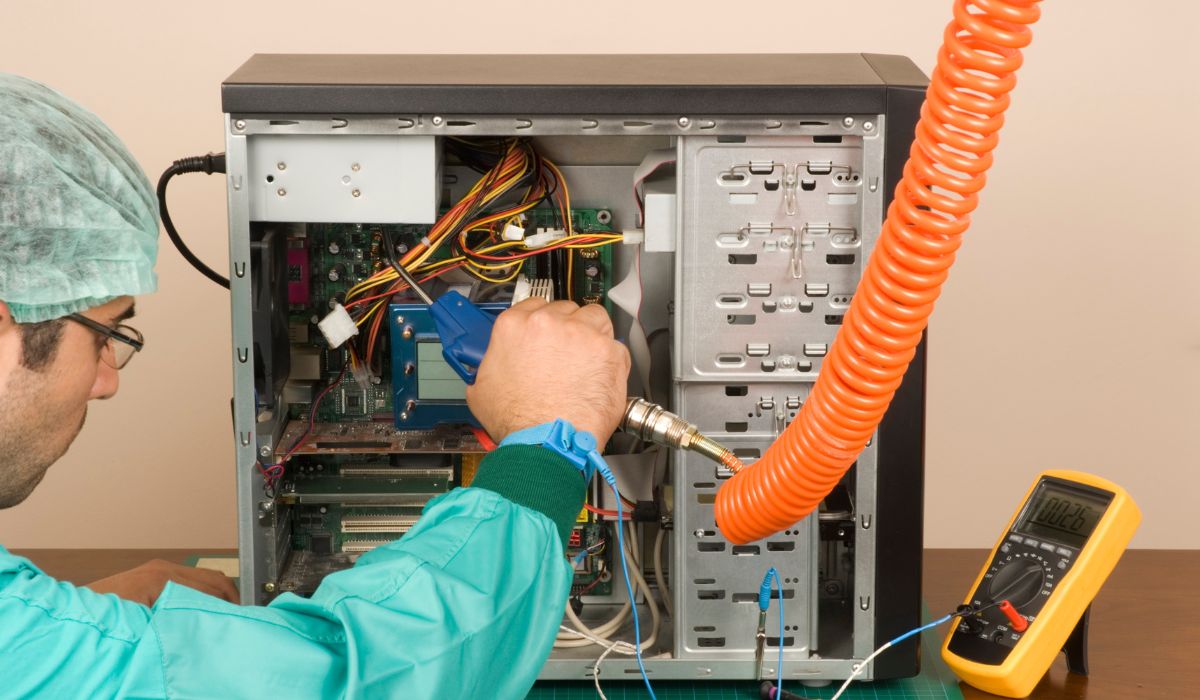
Hardware Cleaning and Maintenance

Proper hardware cleaning and maintenance are crucial for ensuring the longevity and optimal performance of your computer. In this section, we will discuss essential practices for cleaning the computer’s exterior, keyboard, and peripherals, managing airflow, removing dust from internal components, and maintaining cooling systems to prevent overheating.

Cleaning the Computer’s Exterior, Keyboard, and Peripherals

  • Exterior Cleaning: Use a soft, lint-free cloth lightly dampened with a mild cleaning solution to wipe the exterior surfaces of your computer. Avoid using harsh chemicals or abrasive materials that could damage the finish.
  • Keyboard Cleaning: Gently clean the keyboard using compressed air or a soft brush to remove dust and debris. For sticky or soiled keys, use a mild cleaning solution and a cotton swab or a microfiber cloth.
  • Monitor and Peripherals: Clean the monitor, mouse, and other peripherals using appropriate cleaning materials recommended by the manufacturers. Follow their instructions to avoid causing damage.

Proper Airflow Management and Dust Removal

  • Dust Prevention: Keep your computer in a clean and dust-free environment to minimize the accumulation of dust on the internal components. Regularly dust the area around your computer to prevent excessive dust from entering the system.
  • Airflow Optimization: Ensure that the computer’s vents and fans are unobstructed to promote proper airflow. Position the computer in a well-ventilated area and avoid placing it on surfaces that can block the vents.
  • Dust Removal: Periodically clean the internal components of your computer to remove accumulated dust. Use compressed air to blow away dust from the fans, heatsinks, and other hard-to-reach areas. Be gentle and avoid touching the components directly.

Regular Maintenance of Cooling Systems

  • Fan Maintenance: Clean the fans regularly to prevent dust buildup, which can hinder proper cooling. If the fans become noisy or show signs of reduced performance, consider replacing them.
  • Heat Sink Cleaning: Remove dust and debris from heat sinks, which help dissipate heat from critical components like the CPU and GPU. Clean them carefully using compressed air or a soft brush.
  • Thermal Paste Replacement: Over time, the thermal paste between the CPU and heat sink can deteriorate, resulting in decreased heat transfer. If necessary, clean off the old thermal paste and apply a fresh layer to ensure optimal heat dissipation.

By regularly cleaning the computer’s exterior, keyboard, and peripherals, managing airflow, removing dust from internal components, and maintaining cooling systems, you can prevent hardware issues caused by overheating and ensure the smooth and reliable operation of your computer. Remember to follow manufacturer guidelines and exercise caution when handling delicate components to avoid any damage.

Optimizing Startup and Performance

To enhance the startup speed and overall performance of your computer, it’s essential to optimize startup programs, tweak system settings, and utilize helpful tools. In this section, we will explore effective strategies for achieving optimal startup and performance.

Managing Startup Programs

  • Reduce Startup Programs: Review the list of programs that launch during startup and disable unnecessary ones. This can significantly reduce the time it takes for your computer to boot up. You can manage startup programs through the Task Manager or System Configuration utility, depending on your operating system.

Optimizing System Settings

  • Power Settings: Adjust the power settings on your computer to balance performance and energy consumption. For better performance, choose the “High Performance” power plan, but be aware that it may consume more power.
  • Visual Effects: Adjust the visual effects settings to optimize performance. You can choose to disable or reduce animations, shadows, and other visual elements that can consume system resources.
  • Virtual Memory: Adjust the virtual memory (page file) settings to ensure efficient memory management. You can set it to be managed by the system or customize the size based on your computer’s specifications.
  • Background Processes: Identify and limit resource-intensive background processes that might be consuming excessive CPU or memory. Use the Task Manager to monitor and manage these processes.

Utilizing Task Manager and Performance Monitoring Tools

  • Task Manager: The Task Manager provides valuable insights into the performance of your computer, including CPU, memory, disk, and network usage. Use it to identify resource-hungry applications and processes that may be impacting system performance.
  • Resource Monitor: Access the Resource Monitor utility to gain a deeper understanding of system resource usage, including real-time monitoring of CPU, disk, network, and memory activity.
  • Third-Party Performance Tools: Consider using third-party performance monitoring and optimization tools that provide advanced features and insights for fine-tuning your computer’s performance.

By managing startup programs, optimizing system settings, and utilizing tools like the Task Manager and performance monitoring utilities, you can significantly enhance the startup speed and overall performance of your computer. Remember to periodically review and adjust these settings as your computing needs and software usage change over time.

Backup and Data Protection

Data loss can be a devastating experience, but with regular backups and robust data protection measures, you can safeguard your valuable information. In this section, we will explore the importance of data backups, different backup options, and strategies, as well as methods to enhance data security.

Importance of Regular Data Backups

  • Mitigating Data Loss: Backing up your data regularly is crucial to protect against hardware failure, accidental deletion, malware attacks, or other unforeseen events that could result in data loss.
  • Business Continuity: For businesses, regular backups ensure the continuity of operations and minimize downtime in case of data loss incidents.

Backup Options and Strategies

  • Cloud Storage: Consider utilizing cloud storage services such as Google Drive, Dropbox, or OneDrive. These services provide convenient access to your data from multiple devices and offer robust data redundancy and security measures.
  • External Drives: Backup your data to external hard drives, solid-state drives (SSDs), or network-attached storage (NAS) devices. This approach provides offline storage and control over your data.
  • Hybrid Backup: Implement a combination of cloud storage and local backups for added redundancy and flexibility. This strategy ensures data availability even if one backup method fails.

Data Encryption and Password Protection

  • Encryption: Use encryption tools or encrypted storage solutions to secure your sensitive data. Encryption converts data into unreadable format, providing an extra layer of protection against unauthorized access.
  • Password Protection: Set strong, unique passwords for your backup files, folders, and storage devices. This helps prevent unauthorized individuals from accessing your data.

Remember to establish a regular backup schedule that suits your needs and the importance of your data. Automating the backup process can make it more convenient and ensure that your data is consistently protected. Additionally, test your backup restoration process periodically to verify the integrity of your backups and ensure their recoverability when needed.

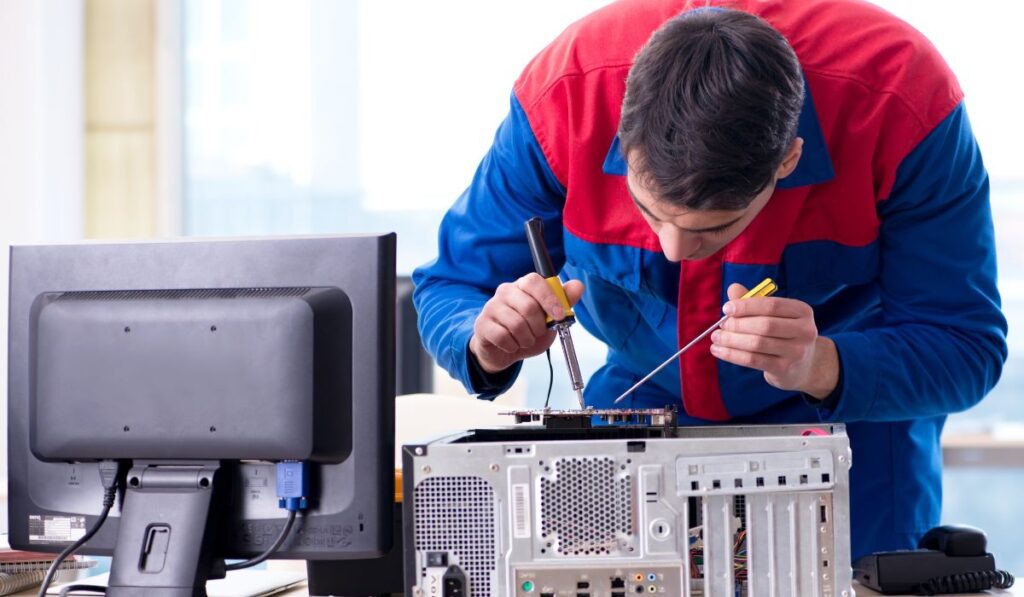
Seeking Professional Assistance for Computer Maintenance

When it comes to computer maintenance, seeking professional assistance can offer numerous benefits and ensure optimal performance for your system. In this section, we will explore the advantages of consulting with experts in computer maintenance and support, introduce Pillar Support’s services in computer maintenance and optimization, and highlight the benefits of collaborating with them.

Benefits of Consulting with Experts

  • Technical Expertise: Computer maintenance professionals possess extensive knowledge and experience in diagnosing, troubleshooting, and resolving various hardware and software issues. They can provide accurate assessments and effective solutions tailored to your specific needs.
  • Time and Effort Savings: By relying on professionals, you can save valuable time and effort that would otherwise be spent researching and troubleshooting computer problems. They can efficiently handle complex tasks, allowing you to focus on other important aspects of your work or personal life.
  • Enhanced Performance and Reliability: Professionals have the expertise to identify underlying performance issues and implement optimization techniques that can improve your computer’s speed, stability, and overall reliability.
  • Proactive Maintenance: Experts can establish a proactive maintenance plan for your computer, ensuring regular updates, security patches, and system checks to prevent potential issues before they escalate.

Introduction to Pillar Support’s Services

Pillar Support specializes in providing comprehensive computer maintenance and optimization services. Our team of skilled professionals can address a wide range of computer issues, from hardware upgrades to software optimization, ensuring that your system operates at its best.

We offer personalized solutions tailored to your specific requirements, taking into account factors such as your computer usage, budget, and performance goals.

Our services encompass various areas, including hardware diagnostics, component upgrades, software installation and updates, system optimization, and data backup and recovery.

Collaboration with Pillar Support

By collaborating with Pillar Support, you can establish a long-term partnership for ongoing computer maintenance and support. Their experts will work closely with you to understand your needs, provide timely assistance, and ensure regular maintenance to keep your computer running smoothly.

Through regular check-ups and proactive monitoring, Pillar Support can identify potential issues in advance and take appropriate measures to maintain efficient computer performance.

Their dedicated support team is readily available to answer your queries, provide guidance, and offer technical assistance whenever needed.

By consulting with experts like Pillar Support, you can benefit from their technical expertise, save time and effort, and ensure that your computer receives the professional care it deserves. Consider reaching out to Pillar Support to explore their services and experience the advantages of professional computer maintenance and optimization.

Remember, regular maintenance is the key to unlocking the full potential of your computer and enjoying a seamless computing experience. Start implementing these practices today and witness the difference it makes in your daily computing tasks.

Frequently Asked Questions

What Is the First Step to Performing Hardware Maintenance?

The first step to performing hardware maintenance is to power off your computer and disconnect it from any power source. This ensures your safety and prevents any damage to the components during the maintenance process.

What Are the Basic Maintenance of a Computer?

The basic maintenance of a computer includes regular software updates, disk cleanup to free up disk space, hardware cleaning to remove dust and debris, optimizing startup programs, backing up important data, and implementing security measures such as antivirus software.

What Are the 4 Types of Maintenance in Computer?

The four types of maintenance in computer systems are:

1. Preventive Maintenance: Performing regular maintenance tasks to prevent potential issues and ensure the system’s optimal performance.
2. Corrective Maintenance: Addressing and fixing issues that arise in the computer system.
3. Predictive Maintenance: Utilizing data analysis and monitoring techniques to predict and prevent potential failures.
4. Adaptive Maintenance: Modifying or updating the system to accommodate changes in requirements or environment.

How Often Should You Do PC Maintenance?

PC maintenance should be done on a regular basis. It is recommended to perform basic maintenance tasks, such as software updates and disk cleanup, at least once a month. However, the frequency may vary depending on your computer usage and specific needs. It is beneficial to establish a routine and perform maintenance tasks regularly to ensure optimal performance and longevity of your PC.

How Do I Clean My Computer?

To clean your computer, you can follow these steps:

1. Power off the computer and unplug it from any power source.
2. Use a soft, lint-free cloth to clean the exterior of the computer, including the monitor, keyboard, and mouse.
3. Use compressed air or a can of compressed air to blow away dust and debris from the internal components, such as the CPU, fans, and vents.
4. Avoid using liquids or harsh cleaning agents as they can damage the components.
5. For more detailed cleaning, you can remove the computer’s side panel and carefully clean the internal components using compressed air and antistatic tools.
6. Remember to handle the components with care and follow proper safety precautions.

Restoring Performance: Bring Life Back to Your Old Desktop Computer

Using an old desktop computer can present a range of challenges and limitations. As technology advances, older computers may struggle to keep up with the demands of modern software and applications. Sluggish performance, longer boot times, and limited capabilities can hinder productivity and user experience. However, there is hope. With the right approach, it’s possible to restore performance in an old desktop computer and unlock its hidden potential.

In this blog post, we will explore the challenges and limitations of using an old desktop computer, shedding light on the issues that users often face. We will also delve into the benefits and possibilities of restoring performance in these machines. By understanding the challenges and exploring the potential solutions, you can make informed decisions about how to breathe new life into your aging desktop and maximize its functionality.

Stay tuned as we dive into the world of restoring performance in old desktop computers. Discover the advantages, explore the options, and learn how to revitalize your old machine. Let’s embark on this journey together and witness the transformative power of restoring performance in an old desktop computer.

Note: We define an old computer as 5 years and older. If you bought the low end of a computer, then 4 years old may be very old. An old computer running an unsupported operating system and is connected to the Internet could be a lot of trouble waiting to happen.

What to Do with an Old Desktop Computer?

When you find yourself with an old desktop computer that you no longer use or plan to replace, there are several exciting possibilities for repurposing or utilizing it. Here are some of the cases that can be done with an old desktop computer:

Transform it into a Media Center

Convert your old desktop computer into a dedicated media center for streaming movies, TV shows, and music. Connect it to your television or home entertainment system and use popular media center software like Kodi or Plex to create a centralized hub for your digital media.

Create a Home Server

Repurpose your old desktop as a home server to store and share files, documents, and media within your home network. Install server operating systems like FreeNAS or set up a file-sharing software like OwnCloud or Nextcloud. This way, you can access your files from any device within your network.

Use it as a Secondary Computer

If you have another computer but need an additional workstation for specific tasks, repurpose your old desktop as a secondary computer. It can be handy for activities like web browsing, email, word processing, or running less demanding software that doesn’t require the latest hardware.

Consider donating your old desktop computer to a charitable organization, non-profit, or school in need. Many organizations accept donated computers and refurbish them for educational purposes or to provide access to technology for underserved communities.

Recycle or Dispose of Responsibly

If your old desktop computer is no longer functional or beyond repair, ensure responsible disposal. Check local regulations or recycling centers that accept electronic waste. They can properly recycle or dispose of the computer components, minimizing environmental impact.

Remember, before repurposing or donating your old desktop computer, make sure to securely wipe your personal data from the hard drive to protect your privacy. There are software tools available that can help you with data erasure or you can remove the hard drive and physically destroy it.

By exploring these options, you can give your old desktop computer a new lease on life and contribute to reducing electronic waste. Choose the option that aligns with your needs, interests, and the impact you wish to make.

Assessing Your Old Desktop Computer

Before deciding whether to upgrade or replace your old desktop computer, it’s important to assess its current condition and performance. Here are the steps to follow when evaluating your old desktop computer:

  1. Identifying signs of performance degradation and hardware limitations

Pay attention to the following indicators that may suggest performance issues:

  • Slow boot times and overall sluggishness during regular use.
  • Frequent system crashes, freezes, or software errors.
  • Inability to run newer software or handle resource-intensive tasks smoothly.
  • Limited storage capacity leading to constant file management challenges.
  • Outdated connectivity options or lack of necessary ports for modern peripherals.
  1. Evaluating the overall condition of the computer’s components

Assess the health and functionality of the various hardware components, including:

  • Processor (CPU): Consider the processing power and speed of the CPU, as it affects overall system performance.
  • Memory (RAM): Check the amount of installed RAM and its compatibility with current software requirements.
  • Storage: Evaluate the capacity and type of storage (hard drive or solid-state drive) and its condition.
  • Graphics Card: Determine the capabilities of the graphics card and its suitability for your needs.
  • Power Supply: Ensure that the power supply unit (PSU) is providing stable power to the system.
  • Cooling System: Check the condition of fans and heat sinks to prevent overheating.
  1. Determining if the computer is worth upgrading or if a replacement is a better option

Based on the assessment, consider the following factors:

  • Age of the computer: Generally, older computers may struggle to meet modern demands.
  • Cost of upgrades: Evaluate the cost of upgrading individual components versus the price of a new computer.
  • Compatibility: Determine if the existing components can be upgraded or if they are outdated and incompatible with newer technology.
  • Long-term usability: Consider the expected lifespan of the upgraded components and if they will adequately meet your future needs.
  • Personal requirements: Assess if the upgraded computer will provide the desired performance for your specific tasks and activities.

By carefully assessing the performance, condition, and potential limitations of your old desktop computer, you can make an informed decision about whether it is worth upgrading or if a replacement would be a more viable option. This evaluation will help you determine the best course of action to optimize your computing experience and meet your needs effectively.

How to Update an Old Desktop Computer?

Updating an old desktop computer can significantly enhance its performance and extend its lifespan. Here are the steps to update your old desktop computer:

Upgrading Hardware Components

  • RAM Upgrade: Increasing the amount of RAM enhances multitasking capabilities and overall system responsiveness. Identify the maximum RAM capacity supported by your computer and install compatible RAM modules.
  • Storage Upgrade: Switching to a faster and more spacious hard drive or solid-state drive (SSD) improves data access speeds and increases storage capacity. Consider upgrading to an SSD for significant performance gains.
  • CPU Upgrade: Upgrading the central processing unit (CPU) boosts processing power, enabling better performance in resource-intensive tasks. Ensure compatibility with your computer’s motherboard and choose a CPU that meets your needs.
  • Graphics Card Upgrade: Installing a newer and more powerful graphics card improves graphics performance and enables smoother gameplay and support for modern applications.
  • Other Upgrade Options: Assess the power supply unit (PSU) and upgrade if necessary to support higher power demands. Improve cooling system efficiency with better fans or heat sinks to prevent overheating. Consider upgrading peripherals like the monitor, keyboard, or mouse for an enhanced user experience.

Software Optimization and Maintenance

  • Remove unnecessary programs and files: Free up system resources by uninstalling unused applications and deleting unnecessary files and folders.
  • Update operating system and drivers: Keep your operating system (e.g., Windows, macOS, Linux) up to date with the latest security patches and bug fixes. Update device drivers for improved compatibility and performance.
  • Perform regular malware scans: Use reputable antivirus software to scan your computer for malware and remove any detected threats. Implement effective security measures to safeguard your system.
  • Utilize system optimization tools: Use software tools like disk cleanup utilities, defragmentation programs, and registry cleaners to optimize system performance. Be cautious when using such tools and ensure they come from trusted sources.

Upgrading hardware components and optimizing the software allows you to breathe new life into your old desktop computer. Evaluate your specific needs, budget, and compatibility before making any upgrades. If you’re unsure about the process or need assistance, consult with a professional or reputable computer support service to ensure successful updates and optimal performance. Enjoy the improved functionality and performance of your updated desktop computer!

Seeking Professional Assistance for Desktop Restoration

old computer desktop

When it comes to restoring and optimizing the performance of your old desktop computer, consulting with experts in desktop restoration can offer numerous benefits. Here are some advantages of seeking professional assistance:

Expertise and Experience

Professionals in desktop restoration possess specialized knowledge and experience in diagnosing and resolving performance issues. They understand the intricacies of hardware and software components and can provide tailored solutions based on your specific needs.

Comprehensive Assessment

Professional technicians can conduct a thorough assessment of your old desktop computer, identifying underlying problems and limitations. They will evaluate hardware components, software configuration, and system health to determine the most effective restoration strategies.

Customized Upgrade Solutions

Collaborating with professionals like Pillar Support allows you to explore the most suitable upgrade options for your old desktop computer. They can recommend compatible components based on your requirements and budget, ensuring optimal performance gains.

Efficient Implementation

Professionals have the expertise to perform hardware upgrades, software optimization, and system maintenance with precision and efficiency. They can handle intricate tasks like component installation, firmware updates, and driver installations, ensuring everything is properly integrated and functioning optimally.

Troubleshooting and Support

In case of any complications or issues during the restoration process, professional technicians can provide timely troubleshooting and support. They have the knowledge to diagnose and resolve problems quickly, minimizing downtime and maximizing the success of the restoration.

Time and Cost Savings

Seeking professional assistance can save you time and effort. Instead of researching and troubleshooting on your own, professionals can streamline the restoration process, reducing the time required to get your old desktop computer up and running optimally. Moreover, their expertise ensures cost-effectiveness, as they can recommend cost-efficient upgrade options that align with your needs.

Pillar Support specializes in restoring and upgrading old desktop computers. Their services encompass a wide range of solutions to improve performance, including hardware upgrades, software optimization, and system maintenance. By collaborating with Pillar Support, you can benefit from their expertise and comprehensive support throughout the restoration process.

Together with Pillar Support, you can identify the most suitable upgrade options for your old desktop computer and implement them effectively. Whether it’s upgrading hardware components, optimizing software, or performing maintenance tasks, their professional assistance will ensure a successful restoration that meets your needs and enhances your computing experience.

Visit Pillar Support’s website to learn more about their services and explore how their expertise can help restore your old desktop computer to its full potential. Embrace the opportunity to work with professionals who are dedicated to delivering exceptional desktop restoration solutions.

How to Get Rid of Old Desktop Computer?

When it’s time to part ways with your old desktop computer, it’s essential to properly dispose of it to protect the environment and your personal data. Here are some recommended steps to get rid of your old desktop computer responsibly:

  1. Data Backup and Secure Erasure

Before disposing of your computer, back up any important data or files you want to keep. Transfer them to an external hard drive, cloud storage, or another device. Once you’ve backed up your data, securely erase the information on your computer’s hard drive to protect your privacy. You can use data-wiping software or seek professional assistance to ensure complete data removal.

  1. Consider Recycling

Recycling is an eco-friendly option for disposing of your old desktop computer. Check with local recycling centers, electronics stores, or community recycling programs to find out if they accept electronic waste. Many locations have dedicated e-waste recycling facilities that can handle the proper disposal of your old computer in an environmentally responsible manner.

  1. Donation or Resale

If your old desktop computer is still in good working condition, consider donating it to charitable organizations, schools, or non-profit groups that accept electronic donations. Alternatively, you may choose to sell your computer through online marketplaces or computer refurbishing organizations, allowing someone else to benefit from its continued use.

  1. Manufacturer or Retailer Take-Back Programs

Some computer manufacturers or retailers offer take-back programs for electronic devices. These programs facilitate the proper disposal or recycling of old computers, ensuring that they are handled responsibly and in compliance with environmental regulations. Check the websites of the manufacturer or retailer to see if they have any recycling initiatives in place.

  1. Professional E-Waste Services

If you are unsure about how to dispose of your old desktop computer properly, you can engage professional e-waste disposal services. These services specialize in the collection, transportation, and proper recycling or disposal of electronic waste, including old computers. They ensure that the e-waste is handled in compliance with environmental regulations.

Remember to remove any personal information from your old computer before disposing of it. This includes logging out of accounts, deleting stored passwords, and clearing browsing history. Taking these precautions helps protect your privacy and prevents unauthorized access to your personal data.

By following these steps, you can responsibly get rid of your old desktop computer while minimizing its impact on the environment. Whether through recycling, donation, or professional disposal services, you can ensure that your computer is handled in a manner that promotes sustainability and proper waste management.

Pillar Support provides a range of services dedicated to desktop restoration and upgrading. By collaborating with their experts, you can benefit from their knowledge of hardware and software, customized upgrade solutions, efficient implementation, and ongoing support throughout the restoration process.

To explore the possibilities of restoring your old desktop computer, we invite you to visit Pillar Support’s website. Their team of professionals is ready to assist you in identifying the most suitable upgrade options, implementing them effectively, and maximizing the performance of your computer.

Don’t let your old desktop computer go to waste. Take advantage of the benefits of restoration, explore professional support, and unlock the full potential of your aging desktop computer with the help of Pillar Support. Visit their website today and embark on a journey to revive and optimize your trusted companion.

Frequently Asked Questions

How to Recycle an Old Desktop Computer?

Recycling an old desktop computer involves finding a designated e-waste recycling facility or program in your area. Check with local recycling centers, electronics stores, or community recycling initiatives to learn about drop-off points or collection events specifically for electronic waste, including old desktop computers. These facilities ensure proper recycling and disposal of electronic components in an environmentally responsible manner.

How to Dispose of an Old Desktop Computer?

Proper disposal of an old desktop computer involves several steps. Firstly, consider recycling options through dedicated e-waste recycling centers or programs. Alternatively, you can explore computer manufacturer or retailer take-back programs that facilitate the proper disposal or recycling of old computers. Another option is to donate or sell the computer if it is still in working condition. Lastly, if none of these options are feasible, consult professional e-waste disposal services that specialize in the proper handling and recycling of electronic waste.

What to Do With Old Computers?

There are several things you can do with old computers. If the computer is still functioning, you can repurpose it for basic tasks like web browsing, media streaming, or as a file server. Alternatively, you can donate it to charitable organizations, schools, or non-profit groups that accept electronic donations. You may also consider selling it to someone who can make use of it. If the computer is no longer functional, recycling it through designated e-waste recycling programs is the most responsible option.

What Was the Old Desktop Computer Called?

The term “old desktop computer” is a general reference to computers that were manufactured and used in the past. There have been various models and brands throughout the history of desktop computers, including popular ones like IBM Personal Computer (PC), Apple Macintosh, Compaq Presario, and Dell Dimension, among others.

Are Old Desktop Computers Worth Anything?

The value of old desktop computers depends on several factors, such as their age, condition, specifications, and market demand. In general, older computers have limited monetary value unless they possess rare or collectible features. However, even if they have little monetary value, they can still be repurposed, donated, or recycled to benefit others and minimize environmental impact.

How Do I Update My Old Desktop Computer?

Updating an old desktop computer involves a combination of hardware upgrades and software optimization. To start, consider upgrading components like RAM, storage (hard drive or SSD), CPU, and graphics card to enhance performance. Additionally, perform software optimization tasks such as removing unnecessary programs and files, updating the operating system and drivers, running malware scans, and utilizing system optimization tools to improve overall performance. Seek professional assistance for guidance on specific upgrade options and implementation.

🤞 Don’t miss these tips!

We don’t spam! Read more in our privacy policy

Upgrading Your Laptop: Get the Most Out of Your Performance

In today’s fast-paced digital world, having a reliable and efficient laptop is essential for work, entertainment, and staying connected. While purchasing a new laptop may seem like the obvious solution to keep up with technological advancements, it’s worth considering the benefits of upgrading your existing device. This article delves into the advantages of laptop upgrade and provides an overview of the key components that can be enhanced, enabling you to make an informed decision about maximizing your laptop’s capabilities.

As technology continues to evolve at a rapid pace, laptops can quickly become outdated, struggling to keep up with the demands of modern applications and tasks. However, before you rush to invest in a brand-new device, it’s important to explore the option of upgrading your current laptop. Upgrading allows you to unlock its full potential, breathe new life into the system, and cater it to your specific needs.

One of the primary advantages of upgrading your laptop is the noticeable improvement in performance. Upgrading key components, such as the processor, RAM, or storage, can result in faster processing speeds, smoother multitasking, and quicker data access. Whether you’re a professional who relies on resource-intensive software or a casual user looking for a seamless computing experience, these performance enhancements can make a significant difference in your day-to-day activities.

Moreover, upgrading your laptop can be a cost-effective alternative to purchasing a brand-new device. While a new laptop may come with the latest features, it often comes with a hefty price tag. By strategically upgrading specific components, you can achieve comparable performance improvements at a fraction of the cost. This cost-effectiveness allows you to extend the lifespan of your laptop while still enjoying the benefits of modern technology.

Additionally, upgrading your laptop provides a level of customizability that buying a new device may not offer. Every user has unique computing needs, and upgrading allows you to tailor your laptop to match those requirements. Whether you prioritize processing power, storage capacity, or graphics performance, you have the flexibility to choose the components that align with your usage patterns, resulting in a truly personalized computing experience.

Throughout this article, we will explore the key components that can be upgraded in a laptop, including the processor, RAM, storage, and graphics card. Understanding the potential enhancements in each of these areas will empower you to make informed decisions about which components to upgrade based on your specific needs and budget.

So, before you consider investing in a new laptop, take a moment to explore the possibilities of upgrading your existing device. Not only can it save you money, but it also allows you to unleash the full potential of your laptop, enhancing performance, customization, and overall user experience. Let’s dive into the world of laptop upgrades and discover how you can maximize your device’s capabilities for years to come.

Understanding Laptop Upgrade

Upgrading your laptop can significantly improve its performance, responsiveness, and overall user experience. By enhancing key components, you can unlock the full potential of your device and cater it to your specific needs. Let’s delve into the importance of various laptop upgrades and the impact they can have on different components.

Importance of RAM Upgrades and Its Impact on Performance

  • Upgrading the RAM allows for smoother multitasking, enabling you to run multiple applications simultaneously without significant slowdowns.
  • Additional RAM enhances the speed and responsiveness of your laptop, reducing lag and improving overall performance.
  • With more RAM, you can handle memory-intensive tasks such as video editing, gaming, and running virtual machines more efficiently.

Exploring the Benefits of Upgrading the Storage with an SSD

  • Upgrading from a traditional hard disk drive (HDD) to a solid-state drive (SSD) results in significantly faster data access and transfer speeds.
  • SSDs offer quicker boot times and faster application loading, allowing for a more seamless computing experience.
  • The absence of moving parts in SSDs makes them more durable and less susceptible to mechanical failure compared to HDDs.

Upgrading the Graphics Card for Enhanced Gaming and Multimedia Experience

  • A more powerful graphics card provides smoother gameplay, higher frame rates, and improved visual quality in gaming.
  • Upgrading the graphics card enhances the rendering capabilities for graphic-intensive applications, such as video editing and 3D modeling.
  • It enables you to enjoy high-definition multimedia content, such as 4K videos and VR experiences, with greater clarity and detail.

Other Components That Can Be Upgraded

CPU: Upgrading the central processing unit (CPU) can significantly boost your laptop’s processing power and overall performance. CPU upgrades are dependent on the motherboard and the cooling to support a faster processor. We do not recommend CPU upgrades as the gain is not as significant as one might think.

Battery: Upgrading the battery can extend your laptop’s battery life, allowing for longer usage without the need for frequent charging.

Display: Upgrading to a higher-resolution or touch-enabled display enhances visual quality and user interaction.

Keyboard and Trackpad: Upgrading to a backlit keyboard or a more precise and responsive trackpad can improve your typing and navigation experience.

By upgrading these components, you can optimize your laptop’s performance, tailor it to your specific needs, and keep up with the demands of modern computing tasks. Remember to check your laptop’s compatibility and seek professional assistance if needed to ensure successful upgrades.

Assessing Your Laptop’s Upgrade Potential

Before embarking on the journey of upgrading your laptop, it’s essential to assess its upgrade potential to ensure a successful and worthwhile investment. By carefully considering compatibility, limitations, available options, and budget constraints, you can make informed decisions about the upgrades that will maximize your laptop’s capabilities. Let’s explore the key factors to consider when assessing your laptop’s upgrade potential.

  1. Checking Compatibility and Limitations of Your Laptop

Every laptop has its unique specifications and limitations that determine the feasibility of certain upgrades. Begin by researching your laptop’s model and specifications to understand what upgrades are supported. Check the manufacturer’s documentation, online resources, or contact customer support to gather information about compatibility and limitations related to specific components such as the CPU socket, RAM type and capacity, storage interfaces, and graphics card compatibility. This knowledge will help you identify viable upgrade options for your laptop.

  1. Understanding the Upgrade Options Available for Your Specific Laptop Model

Once you have identified the compatibility and limitations of your laptop, it’s crucial to explore the upgrade options available for your specific model. Research online forums, user communities, and reputable websites to gather information about successful upgrade experiences shared by other users with the same laptop model. Look for recommendations and guides that provide insights into the potential upgrades for components like RAM, storage, graphics card, and others specific to your laptop model. This research will give you a clearer understanding of the feasible upgrades and their potential impact on your laptop’s performance.

  1. Considering Budget Constraints and Cost-Effectiveness of Upgrades

While upgrades can enhance your laptop’s capabilities, it’s important to consider your budget constraints and weigh the cost-effectiveness of the upgrades. Evaluate the estimated cost of each upgrade and compare it with the benefits you expect to gain. Determine if the performance improvements and extended lifespan resulting from the upgrades justify the expenditure. Additionally, consider the value these upgrades will bring to your specific usage patterns and requirements. Prioritize the upgrades that align with your needs and offer the most significant improvements within your budget.

  1. Seeking Professional Assistance When Needed

Upgrading laptops can sometimes be complex, especially when it involves components like the CPU or graphics card. If you’re unsure about the upgrade process or encounter technical challenges, it’s advisable to seek professional assistance. Consult with authorized service centers, technicians, or experienced individuals who have expertise in laptop upgrades. They can provide guidance, ensure compatibility, and perform the upgrades correctly, minimizing the risk of damaging your laptop or voiding warranties.

By thoroughly assessing your laptop’s upgrade potential, checking compatibility and limitations, understanding available options, considering budget constraints, and seeking professional assistance when needed, you can make informed decisions about the upgrades that will enhance your laptop’s performance and longevity. Remember, each laptop is unique, so tailor your upgrades to match your specific needs and goals.

Step-by-Step Guide to Laptop Upgrades

upgrade laptop

Upgrading your laptop can breathe new life into your device, enhance performance, and cater it to your specific needs. To ensure a successful upgrade process, it’s important to follow a step-by-step approach. This guide will take you through the essential steps involved in laptop upgrades.

  1. Researching and Selecting Compatible Components

Begin by researching and identifying the compatible components for your laptop’s model and specifications. Consider factors such as CPU socket type, RAM compatibility and capacity, storage interfaces, and graphics card compatibility. Refer to your laptop manufacturer’s documentation, online resources, and user forums for detailed information. Once you have determined the compatible components, select the ones that best align with your upgrade goals and budget.

  1. Preparing the Laptop for Upgrades

Before proceeding with the physical installation of upgraded components, it’s crucial to prepare your laptop. Start by backing up all your important data to an external storage device or cloud storage. This ensures that your data remains safe during the upgrade process. Additionally, create a recovery plan by either creating a system image or ensuring you have the necessary recovery media or installation files for your operating system. This allows you to restore your laptop to its previous state in case of any unforeseen issues during the upgrade.

  1. Performing the Physical Installation of Upgraded Components

Follow these general steps for the physical installation of upgraded components:

  1. Power off your laptop and disconnect any external power source.
  2. Refer to your laptop’s documentation or online resources to locate and access the specific component you are upgrading (e.g., RAM slots, storage drive bay, graphics card slot).
  3. Use appropriate tools and techniques to carefully remove the existing component. For example, for RAM, gently press down on the retaining clips on either side of the module to release it.
  4. Insert the new component into the appropriate slot, ensuring it is properly aligned and fully inserted. Apply gentle pressure, if needed, to ensure a secure connection.
  5. Replace any covers or panels that were removed to access the component.
  6. Reconnect the power source and power on your laptop to verify that the new component is recognized and functioning correctly.

Note: The specific steps may vary depending on the component you are upgrading and your laptop’s model. It’s crucial to consult the manufacturer’s documentation or seek professional assistance if you encounter any difficulties.

  1. Updating Drivers and Firmware After the Upgrade

After physically installing the upgraded components, it’s important to update the drivers and firmware to ensure compatibility and optimal performance. Visit the manufacturer’s website or use driver update utilities to download the latest drivers for your upgraded components. Install them according to the provided instructions. Additionally, check for any firmware updates for your laptop’s BIOS or other relevant firmware. Keeping your drivers and firmware up to date will help resolve compatibility issues and ensure that the upgraded components function properly.

By following these step-by-step instructions, you can successfully upgrade your laptop. Remember to take your time, follow safety precautions, and consult professional help if needed. Enjoy the improved performance and enhanced capabilities of your upgraded laptop!

How to Upgrade Laptop Ram? Or How to Add Ram on Laptop?

Upgrading the RAM (Random Access Memory) in your laptop can significantly enhance its performance and multitasking capabilities. Here is a step-by-step guide on how to upgrade the RAM in your laptop:

  1. Determine the Compatible RAM – First, identify the type and capacity of RAM compatible with your laptop. Refer to your laptop’s documentation or visit the manufacturer’s website to find this information. Common types of laptop RAM include DDR3, DDR4, or DDR5, with varying speeds and capacities.
  2. Gather the Necessary Tools – Before starting the upgrade process, gather the necessary tools, including a small screwdriver (if required to access the RAM slots) and an antistatic wrist strap (optional but recommended to prevent static discharge).
  3. Power Off and Disconnect the Laptop – Shut down your laptop and disconnect it from any external power sources. This is important to prevent any electrical mishaps during the upgrade process.
  4. Locate the RAM Slots – Depending on your laptop model, the RAM slots are typically located on the underside of the laptop or beneath a dedicated access panel. Refer to your laptop’s documentation or manufacturer’s website to find the specific location.
  5. Remove the Existing RAM – If your laptop has two RAM modules, gently spread apart the retaining clips on either side of the module until it pops up at a 45-degree angle. Carefully pull it out of the slot. If there is only one module, it may be soldered to the motherboard, making it non-upgradable.
  6. Insert the New RAM Module – Take the new RAM module and align the notches on the module’s connector with the slot in the RAM slot. Insert the module at a 45-degree angle, then gently press it down until the retaining clips on either side click into place. Ensure that the module is fully seated and the clips are securely latched.
  7. Repeat if Installing Multiple Modules – If you are installing more than one RAM module, repeat the process for each module. Ensure they are inserted into the appropriate slots and securely latched.
  8. Replace Access Panel or Battery – If you removed an access panel, securely reattach it. If you removed the laptop’s battery to access the RAM slots, reinstall the battery.
  9. Power On and Verify the Upgrade – Reconnect the laptop to the power source and power it on. Once the operating system loads, go to the System Information or Task Manager to confirm that the new RAM is recognized and functioning correctly. It should display the upgraded RAM capacity.

Congratulations! You have successfully upgraded the RAM in your laptop. Enjoy the improved performance and multitasking capabilities. Remember to handle the RAM modules with care, avoid touching the gold contacts, and follow proper safety precautions throughout the process.

How to Upgrade to an SSD?

Upgrading your laptop to a Solid State Drive (SSD) can significantly enhance its performance by providing faster boot times, improved application loading speeds, and better overall responsiveness. Here is a step-by-step guide on how to upgrade to an SSD:

  1. Backup Your Data – Before starting the upgrade process, it’s essential to back up all your important data from the existing storage drive to an external storage device or cloud storage. This ensures that your data remains safe during the upgrade process.
  2. Determine the Compatible SSD – Identify the compatible SSD for your laptop by referring to the laptop’s documentation or visiting the manufacturer’s website. Consider factors such as the form factor (2.5-inch, M.2, etc.), interface (SATA, PCIe), and storage capacity.
  3. Gather the Necessary Tools – Collect the tools needed for the SSD upgrade, including a small screwdriver (if required to access the storage drive bay) and an antistatic wrist strap (optional but recommended to prevent static discharge).
  4. Power Off and Disconnect the Laptop – Shut down your laptop and disconnect it from any external power sources. This is crucial to prevent any electrical mishaps during the SSD upgrade.
  5. Locate the Storage Drive Bay – Identify the location of the storage drive bay in your laptop. It is often found on the underside of the laptop or behind an access panel. Consult your laptop’s documentation or the manufacturer’s website for specific instructions.
  6. Remove the Existing Storage Drive – If your laptop has a traditional hard disk drive (HDD) or a smaller capacity SSD, you need to remove it. Use a screwdriver to remove any screws securing the storage drive in place. Gently disconnect the drive’s data and power cables if applicable. Slide out the drive from its slot carefully.
  7. Install the SSD – Take the new SSD and align it with the slot or connector in the storage drive bay. Insert the SSD firmly into place, ensuring a secure connection. If necessary, secure the SSD with screws.
  8. Reconnect Cables (if applicable) – If your laptop requires data and power cables for the storage drive, connect them securely to the SSD.
  9. Replace the Access Panel or Battery – If you removed an access panel, reattach it securely. If you removed the laptop’s battery to access the storage drive, reinstall the battery.
  10. Power On and Initialize the SSD – Reconnect the laptop to the power source and power it on. Enter the BIOS or UEFI settings by pressing the designated key (usually F2 or Del) during startup. Locate the storage settings and ensure that the new SSD is detected. Save any changes and exit the BIOS or UEFI settings.
  11. Install the Operating System – To take full advantage of the SSD’s performance, you will need to install the operating system on it. Insert your installation media (USB or DVD) and follow the on-screen instructions to install the operating system on the SSD.
  12. Restore Data and Settings – After the operating system installation, restore your backed-up data from the external storage device or cloud storage. Reinstall applications and configure settings according to your preferences.

Congratulations! You have successfully upgraded to an SSD. Enjoy the improved performance and responsiveness of your laptop. Remember to handle the SSD and other components with care, avoid touching the gold connectors, and follow proper safety precautions throughout the process.

Maximizing the Benefits of Laptop Upgrades

Upgrading your laptop’s components is a great way to enhance its performance and functionality. However, to fully maximize the benefits of these upgrades, it’s important to optimize system settings, manage power and thermal considerations, and perform regular maintenance. Here are some tips to help you make the most of your laptop upgrades:

Optimizing System Settings for Improved Performance

After upgrading your laptop, you can further optimize its performance by adjusting system settings. Here are a few areas to focus on:

  • Power settings: Adjust power settings to prioritize performance over power conservation. Choose the “High Performance” power plan to maximize performance or customize power settings to balance performance and battery life.
  • Visual effects: Disable or reduce unnecessary visual effects such as animations and transparency. This can free up system resources and improve overall responsiveness.
  • Startup programs: Disable unnecessary programs from starting up automatically when you boot your laptop. This can help reduce startup time and free up system resources for smoother performance.
  • Background processes: Monitor and manage background processes to prevent unnecessary resource consumption. Use the Task Manager or third-party software to identify and disable resource-intensive processes or services.

Managing Power and Thermal Considerations After Upgrades

Upgrading components in your laptop may affect power consumption and thermal management. Here’s how to manage these considerations effectively:

  • Power management: Keep an eye on battery life after upgrades, as certain components may consume more power. Adjust power settings accordingly to balance performance and battery life. Consider using power-saving features when running on battery power.
  • Thermal management: Upgraded components may generate more heat, so ensure proper ventilation and airflow. Keep the laptop’s cooling system clean by regularly removing dust and debris from vents and fans. Consider using cooling pads or laptop stands to improve airflow and dissipate heat more efficiently.

Regular Maintenance and Troubleshooting Tips for Upgraded Laptops

To maintain the optimal performance of your upgraded laptop, follow these maintenance and troubleshooting tips:

  • Keep drivers up to date: Regularly update device drivers, including those for upgraded components, to ensure compatibility and resolve potential issues. Visit the manufacturer’s website or use driver update utilities to download the latest drivers.
  • Perform regular disk cleanup: Use built-in disk cleanup tools or third-party software to remove temporary files, system junk, and other unnecessary data. This helps free up disk space and optimize system performance.
  • Run regular antivirus scans: Use reputable antivirus software to scan your laptop for malware and other security threats. Regular scans help keep your system secure and prevent performance issues caused by malicious software.
  • Troubleshoot performance issues: If you encounter performance issues after the upgrade, troubleshoot the problem by identifying potential software conflicts, checking for hardware compatibility, or seeking assistance from technical support or online forums.

By optimizing system settings, managing power and thermal considerations, and performing regular maintenance, you can fully maximize the benefits of your laptop upgrades. Enjoy the improved performance and functionality of your upgraded laptop!

While upgrading your laptop can be a rewarding endeavor, it’s important to note that the process can be complex, and professional consultation and support can provide valuable assistance. Pillar Support offers expertise in laptop upgrades, guiding you through the process and ensuring a successful outcome.

Laptop upgrades unlock the full potential of your device, empowering you to work, play, and create with increased efficiency and enjoyment. Explore the advantages of laptop upgrades and consider seeking professional consultation from Pillar Support to make the most of your laptop’s capabilities. Upgrade your laptop and experience the difference it can make in your digital life.

Frequently Asked Questions

What Can Be Upgraded in a Laptop?

Several components in a laptop can be upgraded, including RAM (Random Access Memory), storage (HDD or SSD), graphics card, CPU (Central Processing Unit), battery, and display. However, the upgradability of specific components depends on the laptop model and its design.

Can We Upgrade Any Laptop?

The upgradability of a laptop depends on its design and manufacturer’s specifications. While some laptops allow for easy upgrades of certain components like RAM and storage, others may have limited or non-upgradable components. It is essential to research and check the laptop’s documentation or consult with the manufacturer to determine its upgrade potential.

Can a Laptop Graphics Card Be Upgraded?

Upgrading the graphics card in a laptop is generally not possible. Unlike desktop computers, most laptops have integrated or dedicated graphics chips soldered onto the motherboard. These chips are not designed to be replaced or upgraded. However, some gaming laptops or high-end models may offer external graphics card solutions through specialized docking stations or Thunderbolt ports.

Is a 10-Year-Old Laptop Worth Keeping?

The value of a 10-year-old laptop depends on its specific condition, performance, and your intended use. While older laptops may struggle to keep up with demanding tasks and lack the latest features, they can still be useful for basic computing needs like web browsing, document editing, and media consumption. Consider factors such as the laptop’s condition, compatibility with modern software, and your personal requirements before deciding whether to keep or replace it.

Is My Laptop RAM Upgradeable?

The upgradeability of RAM in a laptop varies depending on the model. Many laptops have one or more accessible RAM slots that allow for easy upgrading. However, some laptops have soldered RAM modules that cannot be upgraded. It is recommended to consult the laptop’s documentation or contact the manufacturer to determine if your specific laptop’s RAM is upgradeable.

Is It Better to Upgrade an Old Laptop or Buy a New One?

Whether it is better to upgrade an old laptop or buy a new one depends on several factors, including the laptop’s age, condition, performance, and your budget. If your laptop is severely outdated, has hardware limitations, or is no longer meeting your needs, it may be more cost-effective and beneficial to invest in a new laptop.

However, if the laptop is still capable of running essential tasks and can be upgraded to meet your requirements, upgrading specific components like RAM and storage can be a more affordable option. Assess your specific needs and consider the costs and benefits of both options before making a decision.

🤞 Don’t miss these tips!

We don’t spam! Read more in our privacy policy